 |
| Navisworks Option Editor for Revit File Reader |
Findings as I was exploring this feature: You do not need to check the box “Convert
room geometry” which is to convert the Spaces to construction parts. Either way, the Spaces show up. If using the NW Exporter from Revit, I still
needed to have a 3D view as the active view when I issued the command. If you have a Plan View up, example Level 1,
then I found that my Level 1 Spaces came in flat/2D while Spaces from other
floors were 3D. You do
absolutely have to Convert Entire Project.
I can see where this would help to insure all area volumes are accounted for with a Space. Look through the Space Model and find the gaps. Specifically where this helped me tremendously is in the
Revit MEP Loads Analysis. Reviewing the Spaces on the Detail tab, often
you will get a warning about overlapping Space Volumes:
 |
| RMEP Loads Analysis |
It can be difficult sometimes to find the overlapping. Revit will not display the Spaces in a 3D
view, which would help greatly to see and evaluate the Spaces overlapping, so
using Navisworks becomes an important tool for visualization of the Spaces.
Below is a screen shot of how I setup my SearchSets and
Appearance Profiler to make the Spaces easier to evaluate.
 |
| Navisworks Appearance Profiler |
From here, I first tried to run a Clash Detective batch to
find the overlapping Spaces, but discovered that the Spaces did not Clash with
one another. I even used the move to
tool and move one Space clearly into another Space and then Clashed those two
Spaces specifically, but still did not get a Result. I tried both normal Hard clash, and the new Hard(Conservative) clash (See some further notes on this below).
Then I discovered a magic setting, in the Rules tab, I clear the check mark for "Items in same group/block/cell". Very odd, but nonetheless, I got a clash result. Digging a little deeper, I found in Options/Model/Performance/On Load Collapse on Convert to be set to None. Once I set this value, I was able to check the "Items in same group/block/cell" and still get clash.
Then I discovered a magic setting, in the Rules tab, I clear the check mark for "Items in same group/block/cell". Very odd, but nonetheless, I got a clash result. Digging a little deeper, I found in Options/Model/Performance/On Load Collapse on Convert to be set to None. Once I set this value, I was able to check the "Items in same group/block/cell" and still get clash.
 |
| Selected Spaces isolated by Hide Unselected |
Now
to analyze the Spaces' overlapping.
As I rotate around, I can see the problem easily:
 |
| Slight overlap |
Head back into Revit MEP, put in a Space Separator, and my
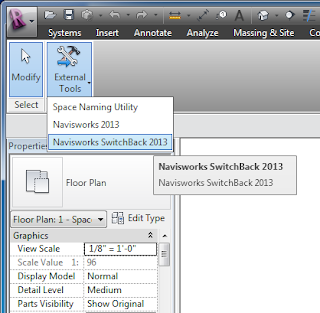
overlapping problem is gone. If you haven't tried the SwitchBack function in Navisworks, now would be a good time to try it. Note: you first have to have Revit open and Switchback turned-on:
A little more detail on the clashing: there is a new Clash Setting option called Hard(Conservative). The difference in the Hard(Conservative) and the standard Hard clashes is in how the defining triangles of an object are evaluated. The normal Hard clashes look for intersecting triangles, while the Hard(Conservative) looks for intersecting space. While this may not be the most accurate of mental pictures, think of it like this: picture clashing two pyramids. Normal Hard will only show a clash when triangle of the two pyramids intersect. Now, for Hard(Conservative) those pyramids' would be inside of a sphere (the sphere represents the pyramids' space), their three-points laying tangent on the wall of the sphere. The Hard(Conservative) then would show a clash if the spheres clash.
dennis


No comments:
Post a Comment
Note: Only a member of this blog may post a comment.