
In previous posts on this blog, we have reviewed two methods that can be used to slice up a Revit model by Level designation:
1) Using the built-in “3D View For Levels” and
2) Using the “DPR Slicer”.
One reason for slicing up the model is for Navisworks, particularly the Timeliner. Timeliner provides the means to build an animation of the building process. Revit does OFTEN apply Level property information to objects as they are placed. However, too often the Level designation information is assigned as <No Level> -or- there can be no level designation –or- if an object spans multiple floors, it will get associated to just the one floor from where the object ‘started’.
The following slides show a model where Filters/Search Sets were generated based on the properties Level designations.
 |
| Highlighting Level 1 showing spanning to multiple floors |
 |
| Highlighting shows those objects who are designated at Level 2 |
 |
| Highlights are Level 3 designated |
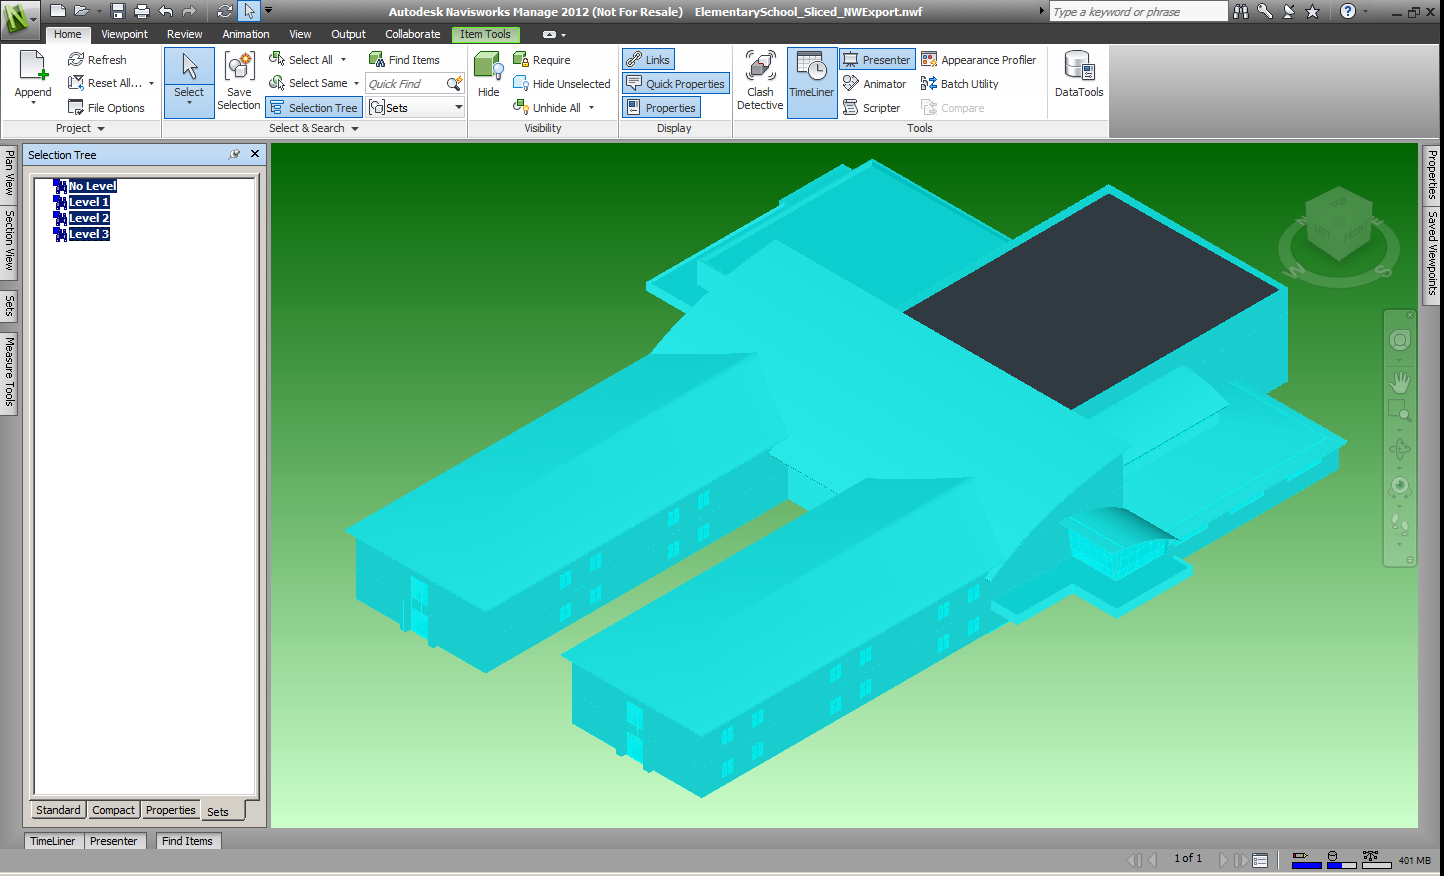 |
| Highlights of all SearchSets reveals a roof still to be assigned |
Now take a look at how the Navisworks Layers designate the objects based on the slicing from the Revit model. Each slide below shows how the model is sliced up at the physical level designation. For clarification of the view, I did setup the floor plans that generated the 3D View Section Box to put the second floor slab within the Level 2 slice by changing the View Range accordingly. Specifically, the top of the Level 1 slice is <-6.5”> below Level 2, and the Level 2 slice includes the slab by having the offset of the base at <-6.5”>.
 |
| The highlight clearly shows a line of separation of the Level 1 slice only |
 |
| Level 2 Slice |
 |
| Level 3 Slice |
Depending on the level of detail you wish to show in Timeliner, you still may have work to do, breaking up the model with Search Sets and Selection Sets. However, for a quick animation, the slicing method produces an easy generation of the Task List in Timeliner, by using the Auto-Add Tasks \ For Every Topmost Layer –or- For Every Topmost Item.

Now compare the two resulting animations:
Quick Timeliner Animation using Slicing
Quick Timeliner Animation using Filters/SearchSets
dennis

When I started reading this post, was amazed at how the design was slowly improved giving me a lasting impression of the software used...
ReplyDeletecafe software
Thank you to tell us so much useful information. So nice sharing. I’m glad to read it.
ReplyDeleteDropshipper