


Here is where the beauty of the Plan Region comes in. Plan
Region allows us to adjust a specific area of a plans View Range. The Plan Region tool can be found under the
View tab, Create Panel, Plans View tool dropdown, and selecting Plan Region.


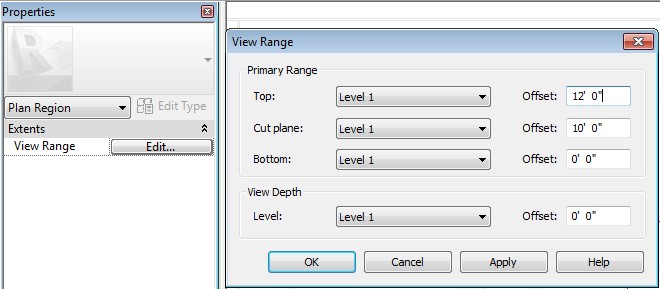
Go to Properties and select the Edit button for View Range.
Adjust the Cut plane to the height that will cut thru your object. We are
choosing 10’-0” for our Basketball hoop. The Top level and offset needs to be
above the Cut plane. See below.
Pick Ok and the Green arrow to finish the sketch. You should
now see the basketball hoop.
Pick Ok and the Green arrow to finish the sketch.
We are done! To go back and edit the View area size, area or height, just select the green dashed line and a contextual tab will appear on the Ribbon with options to edit the Boundary or the View Range. See below.

No comments:
Post a Comment
Note: Only a member of this blog may post a comment.